Frugal Urban Dwellers' Guide: How to Make Worm Castings for Budget Gardening with Upcycled Planters
Starting a garden in the city can save you money and provide fresh food. With some simple tips, you can learn how to make worm castings to transform your garden into a thriving oasis without breaking the bank. Worm castings are a cost-effective way to boost soil health, helping your plants grow strong. This guide covers seed-starting, DIY garden tools, and upcycled planter ideas to help you create a green space right at home.
Embrace Budget Gardening with Worm Castings
Urban gardening can be a rewarding and cost-effective way to enjoy fresh produce. One way to boost your garden’s health without spending a lot is by using worm castings. These nutrient-rich fertilizers are perfect for small spaces and can transform your garden into a thriving oasis. Learn how to make worm castings to enhance your soil health and grow beautiful plants without breaking the bank.
What Are Worm Castings and Why Urban Gardeners Love Them
Worm castings, also known as vermicompost, are the waste produced by earthworms. These tiny powerhouses break down organic matter, turning it into a rich, dark soil amendment. Urban gardeners love worm castings because they are packed with nutrients that help plants grow strong and healthy.
Here’s why worm castings are great for your garden:
Nutrient-Rich: Worm castings contain nitrogen, phosphorus, potassium, and other essential nutrients. They provide five times more nitrogen, seven times more phosphorus, and ten times more potassium than regular soil. (That’s like getting a nutrient boost in a bottle!)
Improved Soil Structure: They improve soil texture, making it easier for water and air to reach plant roots. This is especially important in compact urban soil.
Enhanced Seed-Starting: If you’re into seed-starting, worm castings can help your seeds germinate faster and grow stronger. Mixing them into your seed-starting mix gives your plants everything they need to thrive right from the start.
Cost-Effective: Instead of spending money on expensive fertilizers, you can make your own worm castings at home. It’s a win-win for your wallet and your garden!

Step-by-Step Guide to Creating Your Own Worm Castings
Making worm castings at home is easier than you think. Here’s how to set up your own worm bin in just a few simple steps:
Step 1: Gather Your Materials
You will need:
- A bin: You can use plastic storage containers or wooden boxes. Make sure it has a lid and holes for air circulation.
- Bedding: Shredded newspaper, cardboard, and dried leaves are great options.
- Worms: Red wigglers (Eisenia fetida) are the best for composting. You can buy them online or at local gardening stores.
Step 2: Prepare the Bin
- Drill holes: Drill several holes in the lid and sides of the bin for airflow. This helps keep the worms healthy.
- Add bedding: Fill the bin with about 6 inches of moistened bedding. This gives the worms a cozy home.
- Add worms: Place your worms on top of the bedding. They will burrow in and start making castings.
Step 3: Feed Your Worms
Worms eat kitchen scraps. Here are some safe options to feed them:
- Fruit and vegetable scraps (avoid citrus and onions)
- Coffee grounds and filters
- Eggshells (crushed)
- Small amounts of paper and cardboard
Step 4: Maintain Your Worm Bin
- Keep it moist: The bedding should feel like a wrung-out sponge. If it’s too wet or dry, the worms may not thrive.
- Turn the bedding: Once a week, gently mix the bedding to aerate it. This helps reduce odors and keeps the worms happy.
Step 5: Harvest the Castings
After a few months, your worms will produce rich castings. Here’s how to harvest:
- Separate the worms: Move the castings to one side of the bin and add fresh bedding to the other side. The worms will migrate to the new bedding over a few days.
- Scoop out the castings: Once the worms have moved, you can easily scoop out the castings to use in your garden.
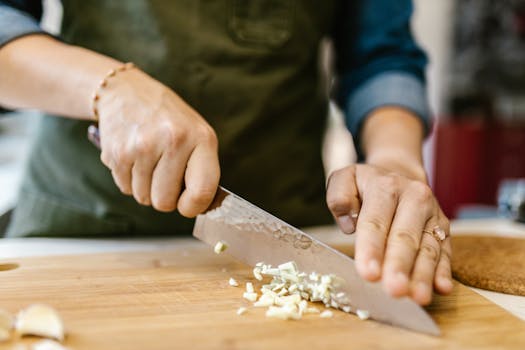
Using simple DIY garden tools like a small shovel or trowel can make this process easier. (Who knew gardening could be this fun and rewarding!)
Transforming Everyday Items into Upcycled Planters
You can also explore avoiding composting mistakes to enhance your gardening experience. Urban gardening often means dealing with limited space. Instead of spending money on expensive planters, consider affordable soil enhancement methods you already have. Upcycled planters are not only cost-effective but also environmentally friendly. Here are some creative ideas:
1. Old Buckets
Old paint buckets or mop buckets can make excellent planters. Just drill a few holes in the bottom for drainage, and fill them with potting soil and plants.
2. Plastic Bottles
Cut plastic bottles in half to create mini planters. You can hang them on walls or windows to save space. Just remember to poke holes in the bottom for drainage.
3. Wooden Crates
If you have old wooden crates, they can be transformed into charming raised beds. Line the bottom with cardboard to keep the soil in and prevent weeds.
Using upcycled planters not only saves you money but also reduces waste. It’s like giving old items a new life! Plus, your garden will look unique and creative.

Practical Tips for Sourcing Materials
Finding materials for your worm bin and upcycled planters can be easy and inexpensive. Here are some practical tips:
Thrift Stores: Check local thrift stores for containers, buckets, and tools. You can often find great deals on items that can be upcycled.
Community Swaps: Participate in community swap events. You can trade items you no longer need for gardening supplies or containers.
Online Marketplaces: Look for free or cheap items on platforms like Craigslist or Facebook Marketplace. Many people give away old pots and containers.
Data on Cost Savings
Using homemade worm castings can save you a significant amount of money. For example, a 5-gallon bucket of worm castings typically costs around $20 at a store. If you make your own, you can produce several buckets’ worth of castings for a fraction of the cost—often less than $5 for the materials.
A Real-Life Example: Urban Gardener’s Success Story
Meet Sarah, an urban gardener living in a small apartment with a balcony. With limited resources, she wanted to grow her own vegetables. Sarah decided to start a worm bin using an old plastic storage container she found at a thrift store.
After a few months, her worm castings enriched her small garden. She used them to start tomatoes and peppers from seed, and they thrived beautifully. Sarah also turned old coffee cans into planters for herbs. Now, her balcony is a lush green space filled with fresh produce, all while keeping costs low.
Sarah’s story shows that with a little creativity and effort, anyone can cultivate a garden on a budget.

Cultivate a Thriving Urban Garden on a Budget
By learning how to make worm castings, you can enjoy a lush urban garden without overspending. Remember, worm castings boost your soil health, and upcycled planters save you money while helping the environment. Start your own worm bin today, and explore advanced composting techniques to upcycle everyday items into planters. Join the journey of budget gardening, and don’t forget to share your projects on social media using the hashtag #FrugalGardeners. Happy gardening!
FAQs
Q: What type of worms should I use for the most efficient worm castings, and how do I ensure they thrive in my setup?
A: For the most efficient worm castings, use red worms, specifically Lumbricus rubellus and Eisenia foetida. To ensure they thrive, maintain a temperature between 55°F to 85°F, provide a bedding of moist newspaper and vegetable scraps, and keep the worm bin covered to prevent odors and fruit fly infestations.
Q: How can I maintain the right moisture and temperature levels in my worm bin to maximize casting production without harming the worms?
A: To maintain the right moisture and temperature levels in your worm bin, ensure the bin is kept between 55°F to 85°F (13°C to 29°C) and regularly check the moisture content, aiming for a damp, but not soggy environment. You can achieve this by adding moist materials like vegetable scraps and shredded paper, while also turning the contents occasionally to promote aeration and even temperature distribution.
Q: What should I do if my worm castings start to smell bad or attract pests, and how can I prevent these issues in the future?
A: If your worm castings start to smell bad or attract pests, ensure that you are burying food scraps deep within the bedding and avoid adding too much at once. To prevent these issues in the future, maintain a balanced diet for the worms, keep the moisture level appropriate, and regularly aerate the compost to promote healthy decomposition.
Q: How do I balance the types of food scraps I add to my worm bin to ensure high-quality castings without overloading the system?
A: To balance the types of food scraps in your worm bin, aim for a mix of nitrogen-rich “green” materials (like fruit and vegetable scraps) and carbon-rich “brown” materials (such as shredded paper or cardboard) in a roughly 2:1 ratio. Avoid overloading the system with high-nitrogen foods, as this can lead to odors and anaerobic conditions; instead, ensure a variety of materials and monitor moisture levels for optimal composting.